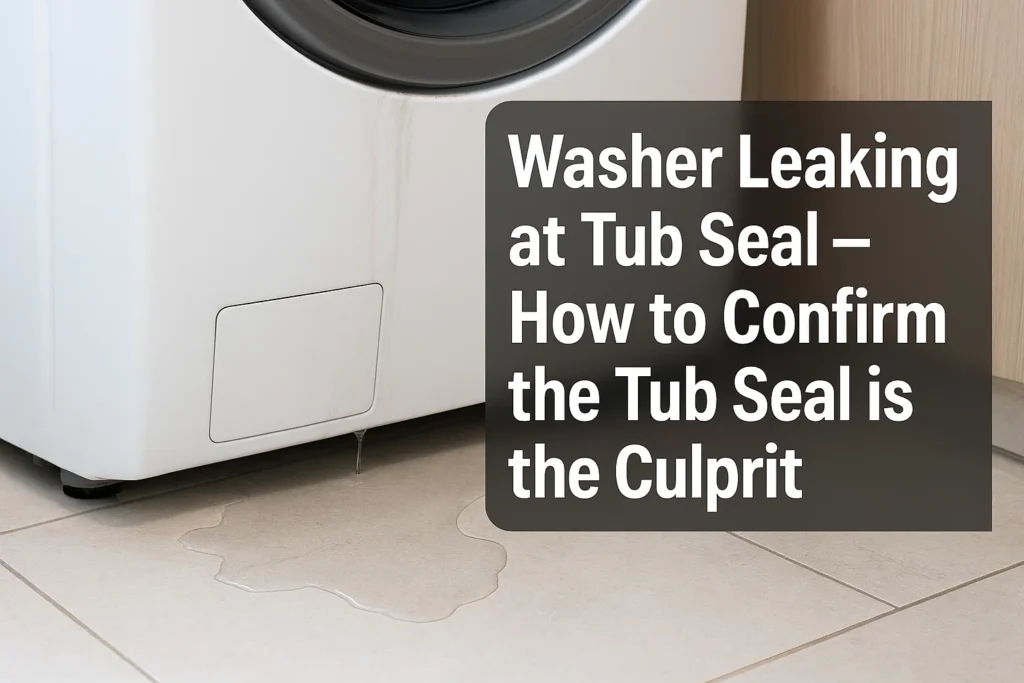
A failing tub seal usually shows up as a small puddle forming mid-cycle or right after spin, accompanied by a damp, oily ring under the center of the machine. You may also notice:
- Fine splatter on the inside of the cabinet.
- A rising hum or rumble as bearings start getting wet.
- Water collecting beneath the pulley or stator area (not just at the door).
If you’re in NYC and this sounds uncomfortably familiar, a quick check from local washer repair pros in New York can save the bearings before they’re toast.
Where to look for drip trails and how to localize the source
- Shine a flashlight under the washer and along the rear/bottom seam of the outer tub.
- Follow gravity: look for mineral “tears,” rusty streaks, or detergent residue tracking down from the center of the tub.
- Slide a dry paper towel under the motor area immediately after a test cycle; wetness here often points to the main seal rather than the front door.
If you prefer a pro eye on the problem, book washer leak diagnostics in NYC.
How a tub seal leak differs from door gasket, hose, or pump leaks
- Door gasket (boot) leaks pool at the front corners; water trails are visible behind the door.
- Hose leaks show beads at clamps or elbow joints, often only during fill/drain.
- Pump leaks drip near the front bottom; you’ll hear sloshing near drain.
- Tub seal leaks appear near the center bottom of the tub, intensify during high-speed spin, and can contaminate the drive area.
Why a washer leaking at tub seal happens: main causes

Wear of the rubber tub seal (age, detergents, high temps)
Seals harden, flatten, or crack over time—harsh detergents and repeated hot washes accelerate that aging.
Damage to drum or tub lip; debris cutting the seal
Coins, bra wires, or chipped drum edges can nick the sealing surface, creating a tiny channel that widens under spin pressure.
Installation errors and misalignment causing leaking at tub seal in washer
If the tub halves aren’t evenly torqued, or the shaft isn’t perfectly centered, the seal rides off-axis, wearing unevenly and weeping.
Quick at-home diagnostics (no disassembly)
Empty-cycle test and short rinse cycle check
Run an empty warm cycle, then a quick rinse. Leaks that spike during spin (not fill) point toward the tub seal.
Flashlight inspection: cracks, tears, residue, mildew
Look for chalky residue or black streaks around the shaft area underneath—classic signs of a compromised seal.
“Drip path” clues: pinpointing where water escapes
Place dry cardboard under the washer. After a cycle, note first-wet spots; mark them. Center-rear wetness is the tub seal usual suspect. If you’d rather skip the crawl test, schedule a same-day washer inspection in NYC.

Full inspection of the assembly — when the front panel must come off
Tools and consumables to prep in advance
Nut drivers, Torx bits, socket set, adjustable wrench, pliers, plastic pry tool, torque wrench, non-marring scraper, shop towels, isopropyl alcohol, food-grade silicone grease, blue threadlocker, and a new seal kit.
Safety first: power off and water supply off
Unplug the unit, close both supply valves, and drain residual water from the hose into a shallow pan.
Photo checklist so reassembly is foolproof
Take angled photos at each step: panel screws, wire harness routes, hose positions, and clamp orientations. Label baggies for fasteners. If you want a tech to handle the teardown, Express Repair NY can do the heavy lifting.
Repair options if washer leaking at tub seal is confirmed
Temporary measures: sealant, clamp reset, cleaning — when they’re acceptable
- Tighten or reseat accessible clamps if the design allows.
- Clean residue from mating surfaces and lightly grease the new lip if the manual specifies.
Temporary sealants on a worn main seal are a band-aid at best—use only to limp along until proper parts arrive. For a lasting fix, consider professional washer seal repair in NY.
Complete tub seal (boot/gasket) replacement: step-by-step
- Remove front panel/top as per model.
- Detension and remove the drive belt (or pull rotor on direct-drive).
- Detach pump/motor harnesses as needed for access.
- Split the tub (clamps/bolts), mark alignment.
- Extract the old seal with a plastic pick; avoid scratching the seat.
- Inspect shaft/bearing play; any wobble means bearings may need attention.
- Clean seat with alcohol; no lint, no grooves.
- Lightly grease the new seal (if required by OEM), press evenly—no twists.
- Reassemble tub halves to factory torque pattern.
- Refit drive system, verify free spin, run a rinse/spin test, and check for drips.
Cleaning the seating surfaces and checking edges to prevent a repeat leak
Remove all scale and soapstone. A single nick on the lip can undo the whole job. If the drum edge is sharp, deburr very lightly.

Choosing a new tub seal and related parts
Finding the correct part number by model and serial
Use the exact model and serial from the door frame label; look up the exploded view to match the seal style and any spacers.
OEM vs aftermarket compatibility: what to verify
Confirm material spec, dimensions, and included clamps. Cheap kits sometimes omit the dust shield or use softer rubber.
Material, hardness, heat resistance — what affects lifespan
EPDM or NBR blends with proper hardness (durometer) and heat/chemical resistance last longer—especially with hot washes.
Brand specifics: where washer tub seal leaks are most common
LG/Samsung: typical assemblies and mounting pitfalls
Direct-drive units demand perfect rotor reinstallation and bolt torque. Misalignment invites rapid seal wear.
Bosch/Siemens: fastening and sealing nuances
Pay attention to clamp orientation and torque. Over-tightening can distort the seal and cause weeping.
Indesit/Ariston/Whirlpool: weak points and reassembly tips
Older models may have tub halves that warp if reassembled unevenly. Cross-pattern torque is essential.
Prevention: how to avoid a washer leaking at tub seal in the future
Correct detergent dosing and routine seal care
Use HE detergent sparingly; over-sudsing sneaks past the lip and leaves residue that dries the rubber.
Program choice and load balance — less vibration, less wear
Avoid chronic overloading; choose spin speeds appropriate to the fabric to minimize shaft side-load.

Weekly 5-minute maintenance checklist
- Wipe the inner lip dry.
- Check for coins/bra wires.
- Run a hot maintenance cycle monthly with a washer cleaner.
DIY vs technician — making the call
Difficulty criteria: access, risk of damaging the tub
If your unit requires full tub split or bearing inspection, the risk of nicking the seal seat is real. Accessibility and special tools matter.
When DIY is fine and when professional service is a must
DIY is reasonable for clamp reseats and straightforward seal swaps. If you detect shaft play, corrosion, or warped tub halves, call a pro like Express Repair NY washer technicians.
Info to share when calling a tech: model, symptoms, leak photos
Provide model/serial, when the leak occurs (fill, wash, spin), and clear photos of drip trails. That speeds up parts selection and repair time.
FAQ on washer tub seal leaks
Is it safe to keep washing if the leak is small?
Not really. Even a “small” leak can reach the bearings or motor. That turns a simple seal job into a costly rebuild.
Will cleaning with vinegar/citric acid help or is repair needed?
Cleaning removes residue that contributes to leaks but won’t fix a cracked or flattened seal. If the leak persists, it’s time for professional tub-seal replacement in New York.
What if it still leaks after replacing the tub seal?
Recheck clamp torque, seating cleanliness, and shaft play. Inspect the drum lip for a nick. If the path still wets the center bottom during spin, consider bearing/shaft wear or a warped tub half—best handled by NYC washer repair experts.