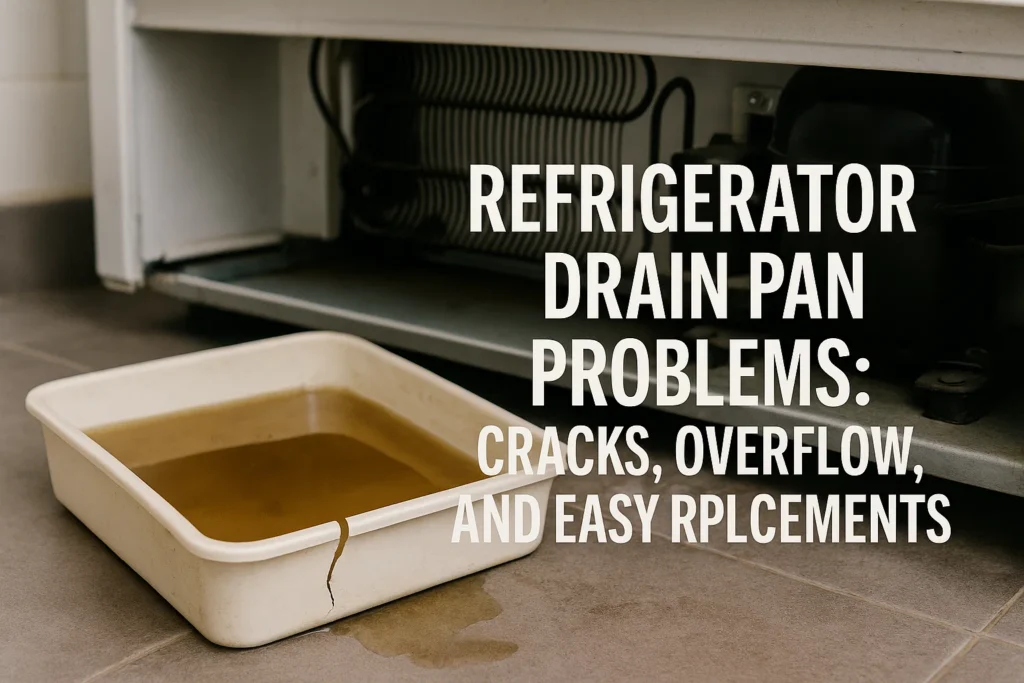
A refrigerator’s drain pan is the unsung hero of defrost cycles. It catches meltwater from the evaporator, then a stream of warm air near the compressor helps that water quietly evaporate. When the pan cracks or the system overfills, you get puddles, odors, and sometimes a suspicious trail across the kitchen floor. The good news: this is one of the more approachable fridge fixes.
Why these drain pan problems happen
- Age + heat cycles = brittle plastic. Most pans are plastic. Years of temperature swings and micro-vibrations from the compressor make plastic stiff and eventually prone to hairline cracks.
- Overflow from a clogged defrost drain. If the drain tube from the freezer compartment gums up with biofilm, crumbs, or ice, water can’t reach the pan quickly enough. It backs up into the fridge/freezer or spills over the pan once it finally rushes through.
- Condenser fan or airflow issues. The warm air that evaporates pan water often comes from the fan near the compressor. Poor airflow (dusty coils, blocked rear clearance) slows evaporation, so routine defrost water accumulates and can overflow.
- Fridge not level. If the refrigerator tilts forward—or the pan isn’t seated correctly—water pools on one edge and finds the path of least resistance: your floor.
- High humidity & door habits. In muggy weather, or when doors are opened frequently, the unit produces more condensate than usual. The pan can briefly fill faster than evaporation can keep up.
- Rubber “duckbill” grommet clogs. Some models use a small rubber check-valve at the drain outlet. It’s great at stopping warm air from entering—but it’s also great at catching lint and sludge.
How to spot the issue early
- Tell-tale puddles. Moisture under the front corners or a damp toe-kick grille is a classic sign.
- Musty, sweet, or sour odors. Stagnant water breeds funk. If the kitchen smells “basement-y” after the fridge runs, look down, not inside.
- Fruit flies or gnats nearby. They love a warm, wet hiding place.
- Water inside the fridge. A clogged drain may show up as a lake under the crisper drawers or sheets of ice in the freezer floor.
- Visual inspection. Unplug the fridge, remove the lower front grille (or pull the unit forward if the pan is rear-mounted), and shine a flashlight at the pan. Look for warped edges, hairline cracks, mineral rings from past overflows, or a pan sitting askew on its rails.

DIY fixes you can do today
Safety first: Unplug the refrigerator. Protect the floor with a towel or tray. Never use sharp tools on plastic parts or near sealed refrigerant lines.
1) Clean and sanitize the pan
- Slide out the drain pan (most lift out easily after removing the toe-kick).
- Empty and wash with warm, soapy water. A soft brush helps with biofilm.
- Sanitize with a mild solution (about 1 tablespoon of unscented bleach per gallon of water). Rinse and dry.
- Important: Don’t mix bleach with vinegar or other cleaners.
2) Clear the defrost drain
- Locate the drain hole at the back of the freezer compartment (often under a small channel).
- Use a turkey baster or squeeze bottle to flush hot (not boiling) water down the drain. Add a bit of baking soda first if you like; then flush.
- If your model has a rubber duckbill grommet at the drain outlet (underneath the fridge), remove it, clean the slit thoroughly, or replace it.
- For an ice clog, repeated hot-water flushes work; give the ice time to melt. Avoid prying with metal objects.
3) Restore airflow and evaporation
- Vacuum dust from condenser coils and the compressor area.
- Ensure a few inches of clearance behind/above the fridge so warm air can escape.
- Peek at the condenser fan while the unit is running (after you plug it back in). If it doesn’t spin, that’s usually a job for a pro.
4) Level the refrigerator
- Most fridges like a slight tilt backward so doors self-close and water drains correctly. Turn the front leveling legs clockwise to raise the front. Use a small level on a shelf; aim for just a few millimeters of tilt.
5) Replace a cracked or warped drain pan (easy parts-swap)
Time: ~15–30 minutes
Tools: Phillips screwdriver, flashlight, glove, towel
- Unplug the fridge and remove the toe-kick or rear cover.
- Slide the old pan out. Inspect mounting rails or tabs so you know how the new one seats.
- Match the part: Find the model number on the fridge label (often inside the fresh-food section or behind the lower kick plate). Search for the exact OEM pan, or a quality aftermarket part, by model.
- Place the new pan, ensuring it sits flat and doesn’t touch spinning or hot components.
- Reinstall the grille, plug the unit back in, and test by pouring a cup of warm water into the freezer drain channel. Watch for leaks and confirm the water lands in the pan.
- Recheck in 24 hours—there should be no new puddles or odors.
Costs to expect: Drain pans are typically inexpensive (often a few tens of dollars), while the bigger cost is time and a little contortion work. If a failed fan motor or blocked coil is involved, that’s where professional service makes sense.

Need urgent help? Professional repair in New York
If you’d rather skip the mess—or you’ve cleared the drain and still see water—there’s a company that handles urgent service in NYC. Check out Express Repair NY for fridge repair. They can diagnose related issues (clogged drains, failed fans, mis-leveled cabinets, damaged grommets) and replace parts quickly so the leak doesn’t ruin floors or cabinetry.